Choosing The Coil Tattoo Right Machine
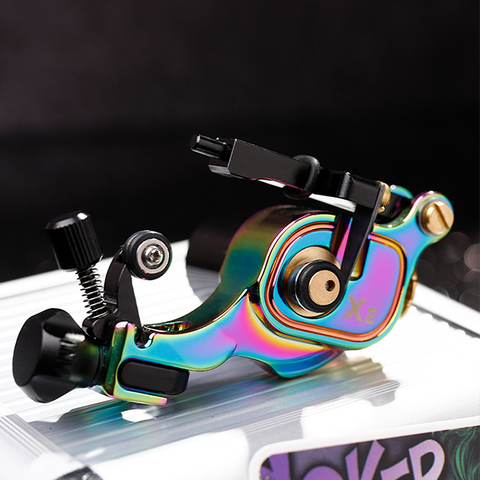
There are a few things you need to consider when choosing a coil tattoo machine:- The type of machine. There are three main types of coil tattoo machines: rotary, coil, and pneumatic. Each has its own advantages and disadvantages.
- The size of the machine. You need to make sure the machine you choose is big enough or small enough for the area you want to tattoo.
- The power source. Most machines use either electricity or batteries, but there are also some that can be powered by compressed air (pneumatic machines).
- The price. Tattoo machines can range in price from a few hundred dollars to several thousand dollars. Choose one that fits your budget and needs.
How to Set Up Coil Tattoo Machines
There are a few things you need to do before you can start using your coil machine. Follow these steps and you'll be up and running in no time!
- Choose the right power supply. If you're using a coil machine, you'll need a power supply that can handle the high amperage draw of the machine. Look for a power supply that has an adjustable voltage output so you can dial in the perfect power level for your machine.
- Assemble your coil tattoo machine. Most coil machines come with everything you need to get started, but it's always a good idea to double-check all of the parts and make sure everything is tightened down before you plug it in.
- Install your needles. Once your machine is together, it's time to install the needles. Make sure they're all facing the same direction and screwed in tight so they don't fall out during use.
- Prime your coil tattoo machine. Before you start tattooing, you need to prime your machine by running it without any ink for a few seconds. This will help ensure that the ink flows properly when you start tattooing.
- Adjust the tension on your springs. The tension on the springs inside your coil machine determines how fast or slow the needles move up and down. If they're too loose, the needles will move too fast and could break skin; if they're too tight, the tattoo will be blurry and won't look as crisp as.
Power Supplies
Most tattoo guns are powered by a specialised power supply unit (PSU). These provide a consistent, regulated flow of power to the coil tattoo machine, which is essential for good tattooing results. There are many different types and brands of PSU available on the market, so it's important to do your research and choose one that will suit your needs.
When choosing a power supply unit for your coil tattoo machine, there are a few things you need to take into account. The first is the voltage output. Most coil tattoo machines will require between 6 and 12 volts, but some newer models may require up to 18 volts. It's important to check the specifications of your machine before purchasing a power supply unit.
The second thing to consider is the amperage output. This is the amount of current that the power supply unit can provide. Most machines will require between 1 and 3 amps, but again, it's important to check the specifications of your machine before making a purchase.
Once you've taken these factors into account, you can start looking at different power supply units on the market. There are many different brands and models available, so it's important to do your research and find one that suits your needs.
Connecting The Machine To A Power Source
The first step in setting up your coil tattoo machine is to make sure it is properly connected to a power source. Depending on the type of machine you have, this will either be an electrical outlet or a battery.
If you are using an electrical outlet, simply plug the power cord into the machine and then into the outlet. If you are using a battery, you will need to connect the positive and negative leads from the battery to the corresponding terminals on the machine.
Once your machine is properly connected to a power source, you will need to test it to make sure it is functioning properly. The best way to do this is to put a needle on the machine and turn it on. The needle should move up and down smoothly without any jerking or stuttering. If everything appears to be working correctly, you are now ready to start tattooing!

Additional Considerations
If you're thinking about setting up a coil tattoo machine, there are a few additional considerations you should take into account. Here are a few things to keep in mind:- Make sure you have the proper supplies. In addition to a coil tattoo machine, you'll need sterile needles, ink, and other supplies.
- Choose a location for your tattoo studio carefully. It should be clean, well-lit, and comfortable for both you and your clients.
- Make sure you're familiar with the basics of tattooing before you start tattooing others. There's a lot to learn, so it's important to do your research before getting started.
- Be prepared for unexpected challenges. Tattooing can be unpredictable, so it's important to be flexible and ready to troubleshoot if necessary.

